How To Pour Concrete On A Slope
May/03/22
Pouring concrete is a common process in most all construction projects. As concrete has become one of the leading materials in commercial and residential construction, the odds that your project will include this element are high. But pouring concrete for say, a flat slab like a floor, or a sloped slab like a driveway is actually a relatively different process entirely. While they may both include the concrete mixture, there are key differences that need to be considered when carrying out the pour. Concrete poured on a slope requires extra considerations to ensure it is just as durable and strong as your typical flat-surface concrete pour.
Choosing Your Concrete
When pouring concrete on a slope, you want to ensure that you’re choosing the correct type of concrete to avoid any issues in strength and structural integrity. For sloped concrete pours, the most commonly used concrete type is low-slump concrete. Low-slump refers to the higher proportion of cement to water. This makes it harder to use, but the trade-off is a strong final result. Concrete poured on a slope requires this strength, because aside from the vehicle and foot traffic it may encounter, it has the added challenge of needing to resist gravity, and avoid downhill slumping. Low slump concrete’s characteristics allow it to stay in place when poured and take compaction properly. Using the wrong type of concrete for your sloped pour could waste time and money.
Slope Concrete Pouring Process
Because sloped levels have more variables to consider than a typical flat-surface pour, the pouring process for a slope looks different. The following are steps to consider:
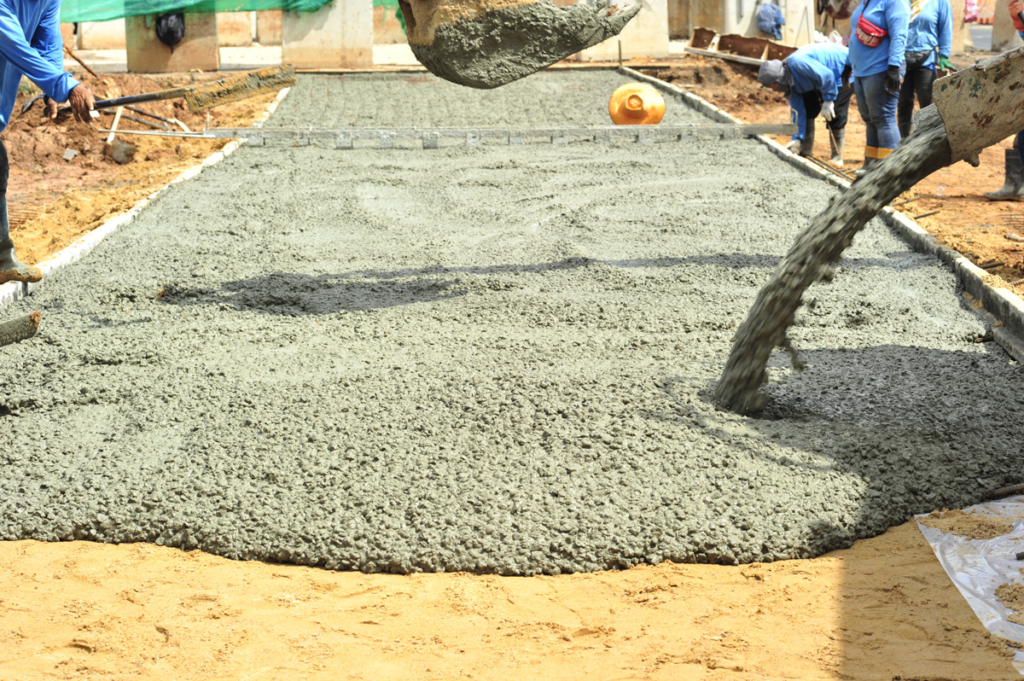
- Prepare the ground for pouring by ensuring the surface is level and the formwork is properly installed. This includes ensuring all the necessary reinforcements and embedment objects are in place. Additionally, check that any rocks, dirt, or debris are out the way.
- Check the slope of your project. Slopes that are less than 30 degrees require slump values to range from 5 cm to 10 cm. For slopes between 30 and 45 degrees, the slump values should be 2.5 cm to 7.5 cm. And lastly, for slopes steeper than 45 degrees, use double forming concrete for a thickness of 15 cm or more, or use shotcrete.
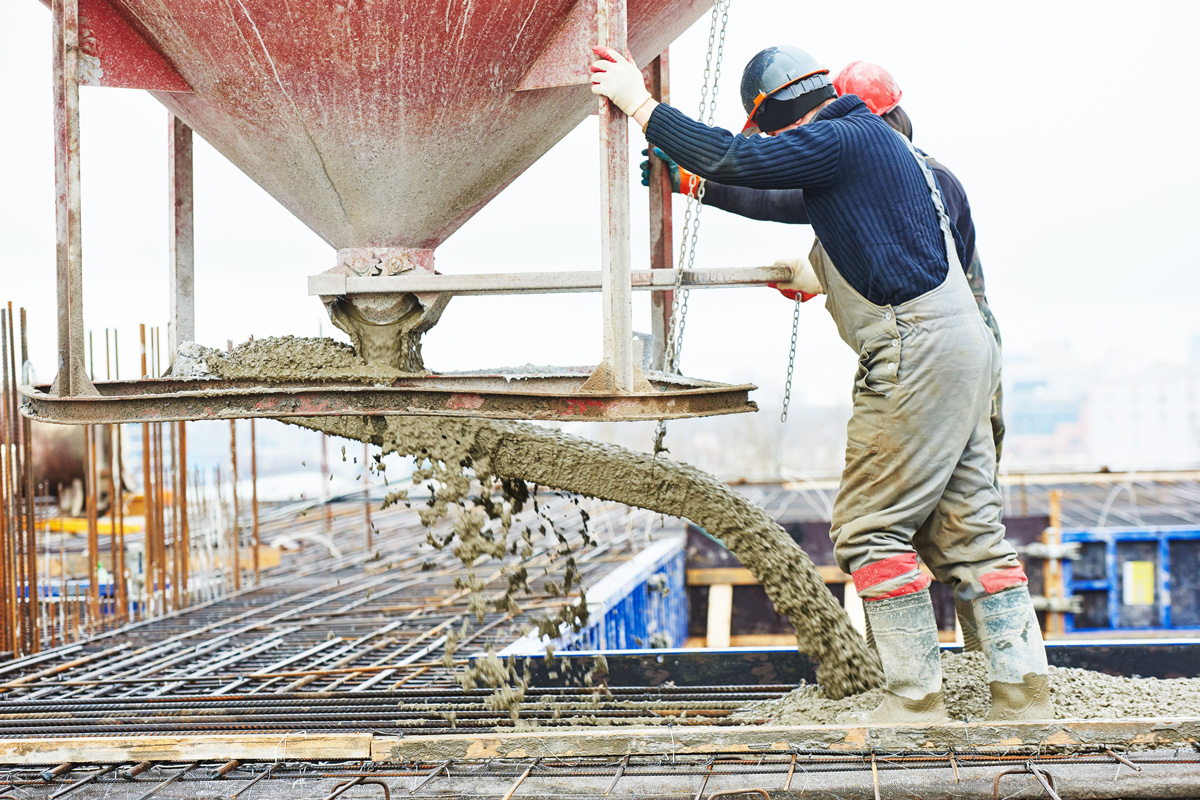
- Double-check that the concrete you have ordered is low-slump. As aforementioned low-slump concrete has a lower amount of water, making it stronger but harder to work with. If needed, you can conduct a slump test on the concrete when it arrives. This way you are sure that the mixture is suitable for the project.
- When pouring your concrete, make sure to begin from the lowest part of the slope. As the pour progresses, it can be brought upwards gradually to ensure that everything stays level and to avoid any downward movement of concrete.
- Consider adding reinforcements. Depending on the project you are working on and the slope of the concrete pour, you may need to add reinforcements in the forms to ensure everything stays in place. If you need extra strength, lay down rebar robs into the concrete while it’s still wet. These will act as additional support.
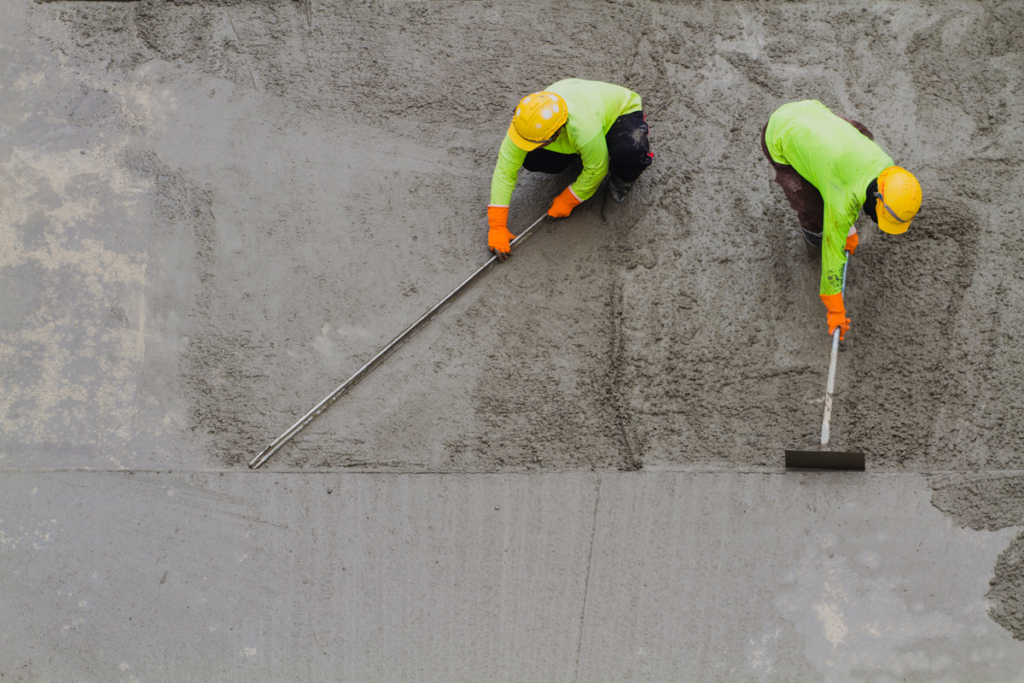
- While the concrete is still wet, apply vibration to the surface. Vibration energy compacts the concrete and shakes out the air bubbles to get rid of any gaps or voids in the slab. Once this is done, scrape off the excess concrete from the top to reveal a smooth, even layer. From there, add whatever surface finish the project calls for.
- For proper curing and drying, allow for 3 days or 72 hours for the concrete to harden. When it has finished hardening, remove the wooden forms and inspect the final project. Because sloped concrete pours already require less water than traditional flat-surface pours, if there has been any added moisture, consider adding extra time for curing.
Ensuring Proper Drainage
When working on a sloped surface, it is important that all your decisions are made with drainage considerations in mind. Concrete that has not properly been sloped will cause issues in water drainage and could result in rot, mold, or flooding. The rule of thumb for slope and proper drainage is a one-quarter drop for every foot of length. This would mean you need to find the difference in height between one end of the slope and the other, and then multiply that by one-quarter.
If you’re building next to a structure, commercial or residential, oftentimes the ground will naturally slope away from the building. But, this isn’t always the case. To avoid expensive water damage, you need to account for proper drainage before pouring the concrete. This is why site inspections prior to designing walkways and slopes are key. Keep in mind that all these slope measurements are simply a standard consideration. If you’re in an area that has an exceptionally high amount of precipitation each year, then you may want to account for extra drainage needs.
A-Core Pouring Concrete
A-Core Concrete Specialists have been in the concrete business for over 45 years, and each day they are dedicated to serving the Utah area with exceptional talent and experience. Our local team of construction professionals is here to help you in any of your concrete needs, from cutting, drilling, pouring, scanning, among many others. If you’re looking for an expert helping hand on your next concrete project, call us today.